Do you have a coffee table that is in need of a facelift? Or a thrift store item that needs a bit more personality? Fear not! There is 1 DIY tool that can completely change your decorative look and that tool is contact paper!
Think of contact paper as a super fancy sticker, which on one side is sticky and can attach to any surface while the other side is a super smooth design. They come in a variety of designs and the price ranges from $6-$40.
Today I will show you how this 1 DIY tool has the able to transform an old or used item into something expensive and unrecognizable!
Contact paper transformation #1: coffee table
Our IKEA coffee table has the cool ability to lift half of the top up while giving the option to store things on the inside which is such a great storage hack! However, the only color they had in stock was white. While this is a great neutral color, especially for our living room with the vibrant orange walls, we wanted to change it a bit.
To solve this, we bought ebony wood grain contact paper from Home Depot for $6.99. It was incredible to see how it looked like real wood. Once we finished placing the contact paper on our IKEA coffee table, it not only fit with our rustic style but it also made it look very chic and expensive.

Contact paper transformation #2: glass tabletop
A contact paper design that had caught my eye was marble. Looking through endless YouTube videos, everyone was raving about marble contact paper. It had a very clean and crisp look which could be applied to an endless number of items.
One of those items was a glass tabletop placed on my dresser (which has been with me for YEARS). After we finished applying the marble contact paper, the glass tabletop went from unnoticeable to glamorous. Thank you endless hours of DIY YouTube videos!

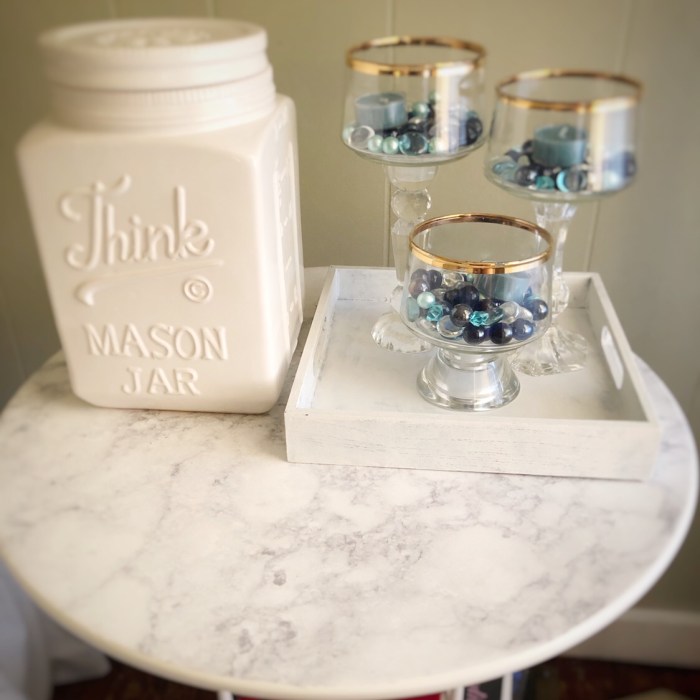
Contact paper transformation #3: bedroom side table
After successfully upgrading the glass tabletop, no surface was safe from me and my amazing marble contact paper sidekick. The next victim of this DIY binge was an inexpensive IKEA side table. Prior to the upgrade, parts of it had minor scratches but with contact paper, those became well hidden! Now it looks rejuvenated and blended well with all the newly bought thrift items!
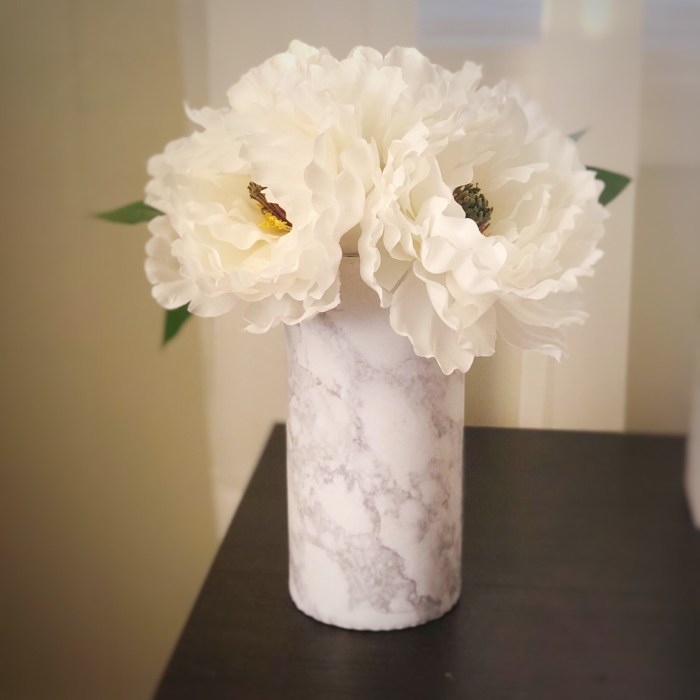
Contact paper transformation #4: vase
My serious contact paper DIY binge continued (warning: you might have the urge to place contact paper on everything, you have been warned) with my last marble contact paper victim, a vase. I love vases of all different shapes, sizes and colors. However, I had one clear cylinder vase that needed a bit of a change. This took only a few minutes to measure, cut and apply. Now it is on my office desk looking lovely
As you can now see, you can change multiple things around the house with the help of the right contact paper. Let me know in the comment section below if you have ideas that you would recommend or if you have any questions about using contact paper!
Cindy
P.S.: If you are interested in seeing the list of all of our blog posts please click here
That looks really chic. Well done!
LikeLiked by 1 person
Thank you so much! Highly recommend getting some contact paper if you are in the DIY mood 😉
LikeLiked by 1 person